
First Permanent Molar Caries: Check the Erupting Molar Early
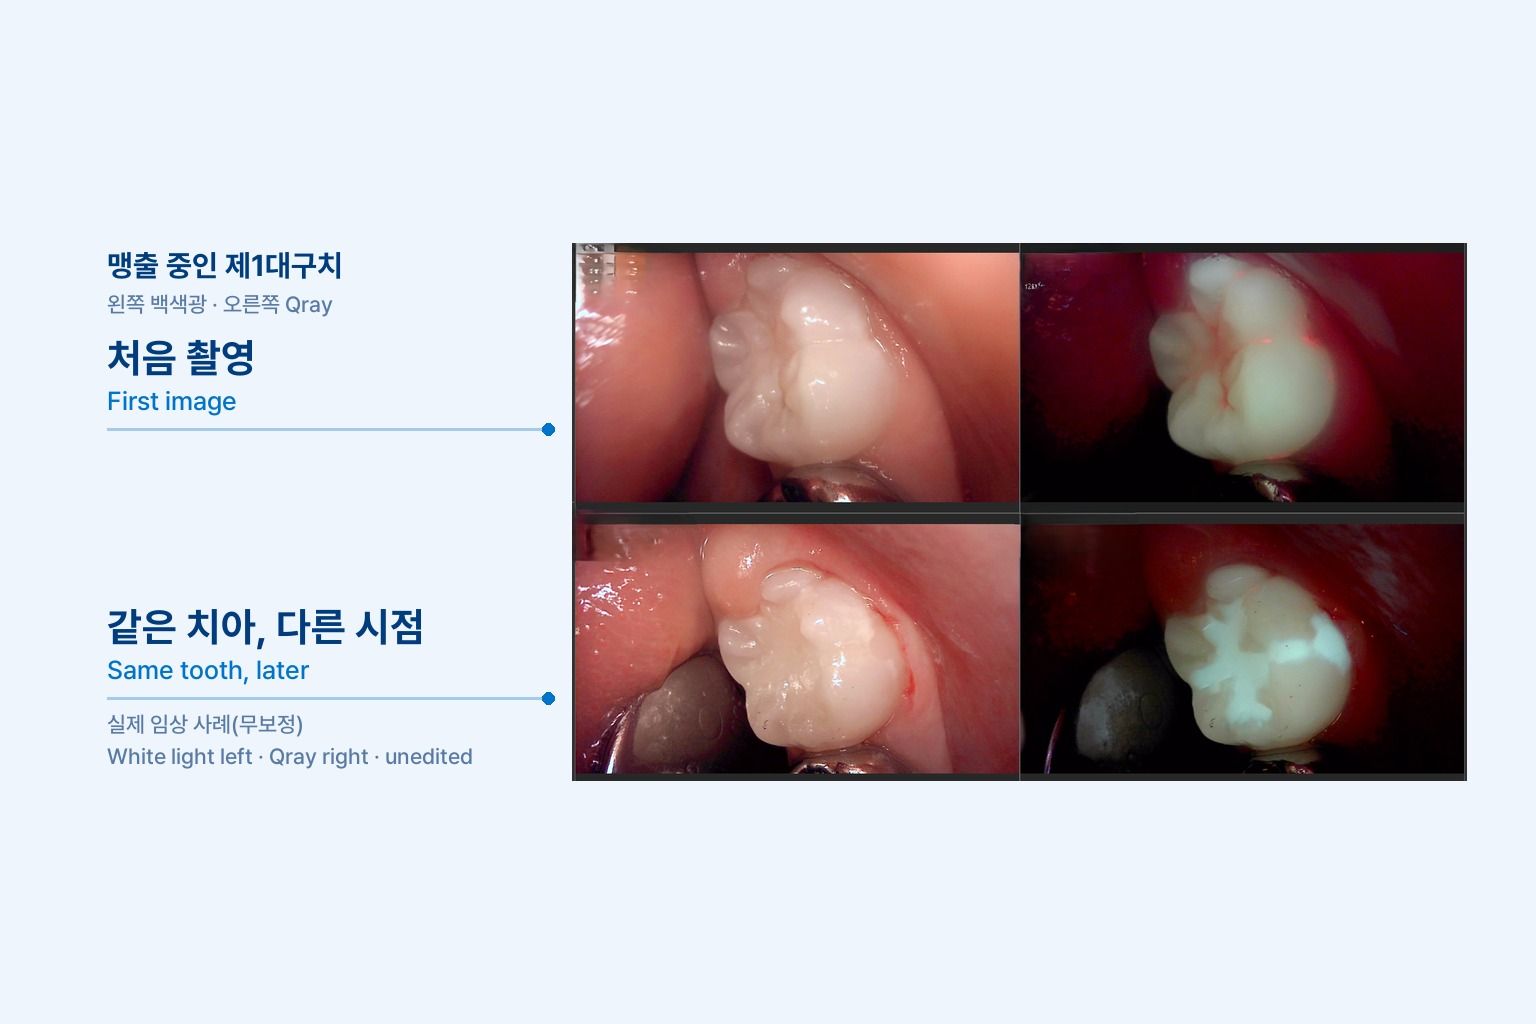
First permanent molar caries is the lesion parents notice last. An eight-year-old comes in for a recall, and the six-year molar is halfway through behind the primary teeth. The occlusal surface looks white and smooth, and the child has never complained. But there is food packed in the buccal pit, and the distal is still under a flap of gingiva. This article walks through where to look on an erupting molar, what fluorescence imaging adds, and how to explain the finding to a parent in a way that leads to a plan.
Why do erupting first molars decay so easily?
The first permanent molar erupts quietly behind the primary dentition, so it becomes the least-cleaned tooth in the mouth while it comes in. Parents watch the front teeth during the transition, but the six-year molar arrives without a primary tooth falling out first. Many families do not realize a new tooth is there at all.
During eruption the occlusal surface is below the occlusal plane and partly covered by gingiva. Chewing does not clean it, and the brush catches on the teeth in front before it reaches the back. Plaque sits under the operculum and deep in the fissures for days.
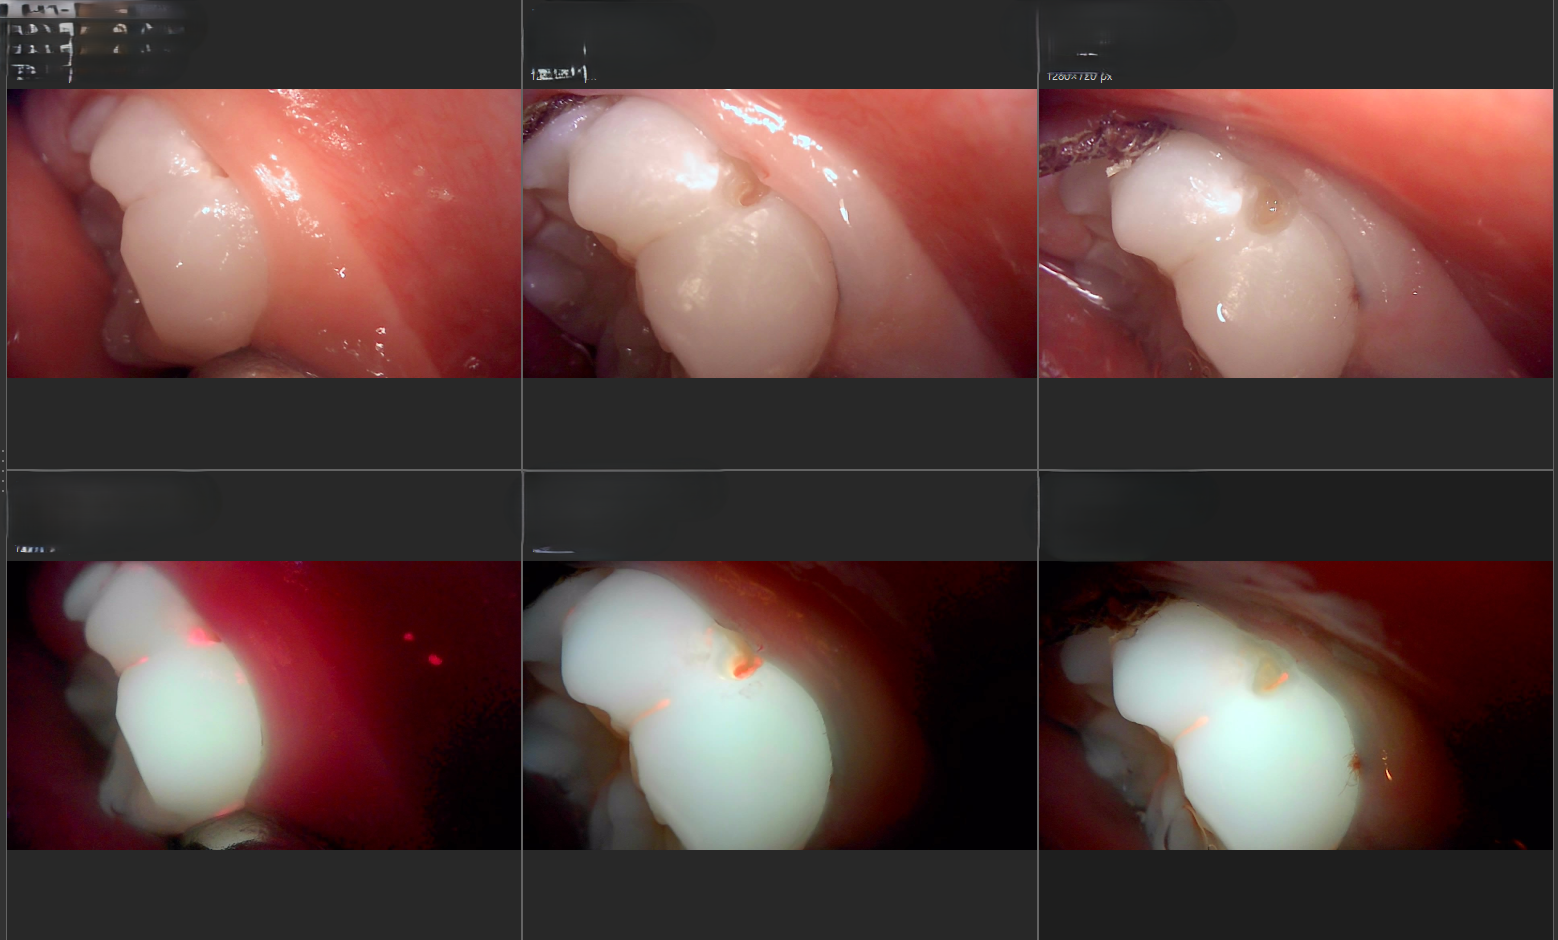
The buccal pit and occlusal fissures can have narrow openings over wider spaces below. Clinicians in one case discussion described buccal pits on erupting first molars where food impaction led to lesions that spread under the enamel further than the surface suggested. Another noted that caries in recently erupted molars in young patients often has less defined borders than in adults and spreads more diffusely.
Where should you look first?
Follow the plaque. On an erupting six-year molar, three sites matter most.
- Buccal pit: the small pit in the middle of the buccal surface. Food packs in, and children almost never clean it on their own.
- Occlusal fissures: lesions start along the deep grooves, and stain needs to be told apart from caries.
- Distal gingival margin: the part still under the gingiva, where plaque collects and tissue inflames easily.
White light and Qray fluorescence answer different questions. White light shows white spots, brown stain and small surface defects. On a Qray fluorescence image, sites where bacteria have stayed for some time appear red, and areas that have lost mineral appear darker than the surrounding enamel. Plaque itself also fluoresces red, so fissures are re-imaged after cleaning to see whether the red disappears from the surface or remains below it.
What does the research say about fluorescence in children's teeth?
One clinical study examined 878 primary tooth surfaces in 44 children with visual inspection, radiographs and fluorescence imaging. Staging based on the fluorescence images matched the progression of the lesions, and its reliability for detecting caries was similar to or slightly higher than that of visual inspection or radiographs under clinical conditions. The authors added that the method provides images while also allowing lesions to be analyzed quantitatively.
The study was done on primary teeth with research equipment and analysis software. It does not transfer directly to erupting permanent molars, but it shows what a fluorescence image can add next to the visual exam and radiographs when you are looking at a child's teeth. The decision is always made together with the other findings.
A chairside sequence for the six-year molar
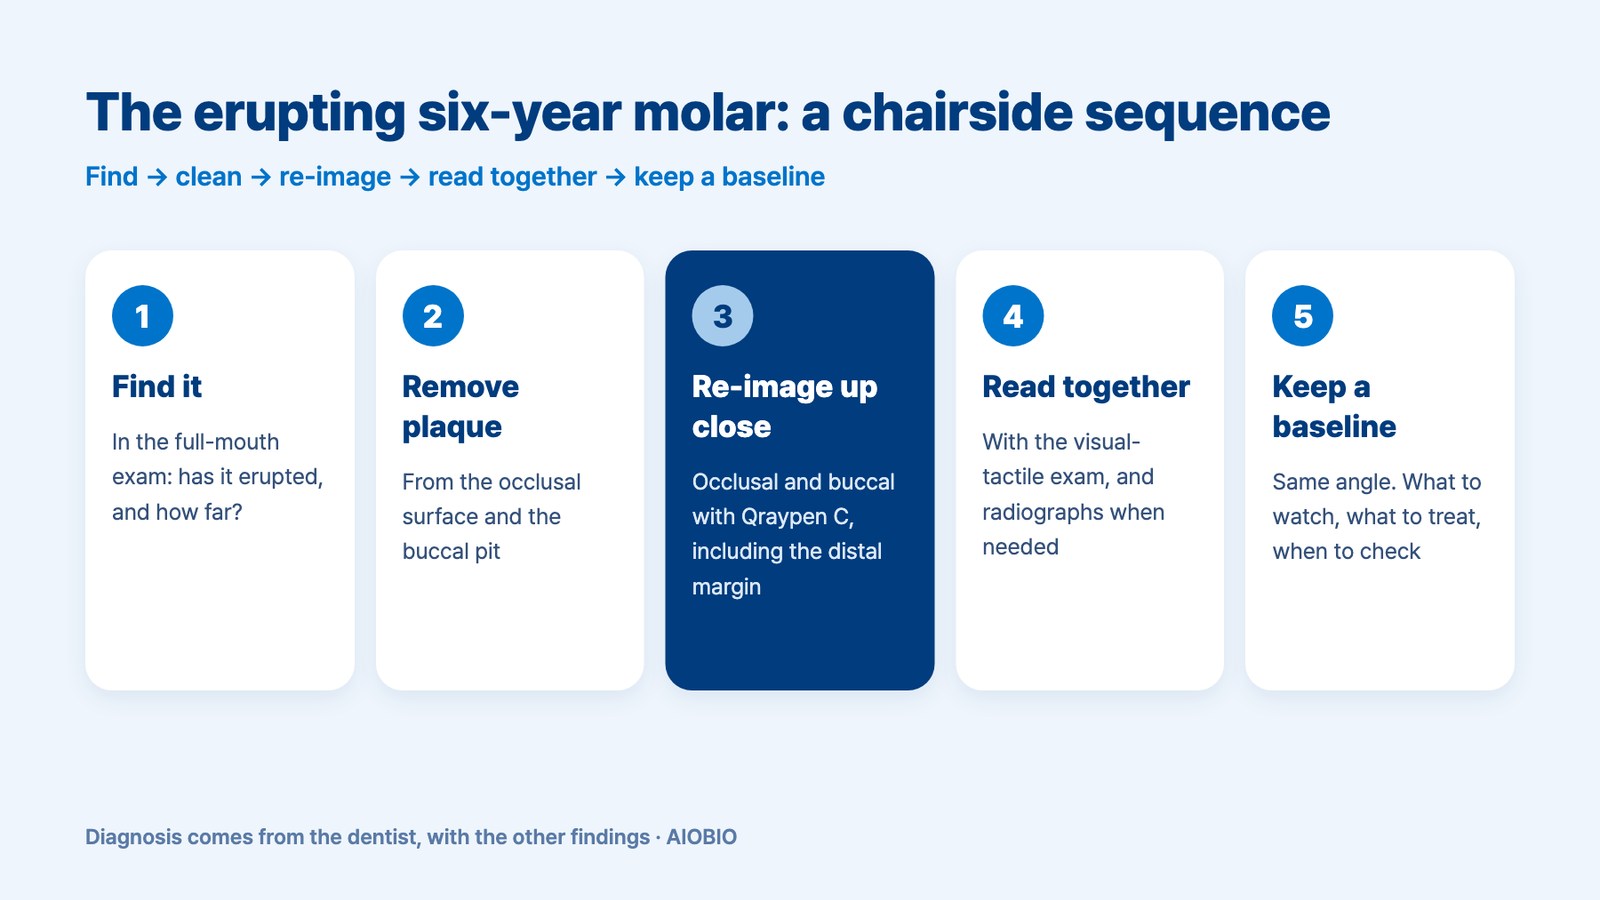
- Check whether the first molars have erupted and how far, as part of the full-mouth exam.
- Remove plaque and food from the occlusal surface and the buccal pit.
- Re-image the occlusal and buccal surfaces up close with Qraypen C, including the covered distal margin.
- Read red fluorescence and darker areas together with the visual-tactile findings, and compare with radiographs when needed.
- Save a same-angle baseline, then sort what to watch, what to treat, and when to check again.
With parents, use the same screen and answer three questions: where, why, and what you will check next time. "This is the first permanent molar, and it's still coming in. The gum is still covering part of it, so the toothbrush doesn't reach well. There's a red area in this small pit on the cheek side, so we'll keep today's image and look at the same angle again at the next checkup." Clinicians have also shared that when treatment is needed, showing parents the before, during and after images helped them understand why the preparation was the size it was.
What's next
An erupting molar is never a one-visit story. The image you take today is stored in LINKDENS and sent to the family as a report, and at the next recall it sits side by side with a new image from the same angle. If you chose to watch, it is the evidence for whether anything changed. If you sealed or restored, it is the reference for checking the margins. No image guarantees the family comes back, but recording the first permanent molars the same way from the day they erupt is how a single exam turns into ongoing care. That shift from reacting to lesions to managing them over time is what we mean by Reactive to Proactive.
FAQ
Q. When should first permanent molar caries be checked?
A. First molars usually start erupting around age six, though timing varies from child to child. From the visit where you first see the tooth coming in, look at the occlusal surface and the buccal pit together, and set the next check by risk.
Q. Should an erupting molar be sealed right away?
A. First confirm the tooth is erupted enough to keep dry, and whether caries already exists under the fissures. Re-image the fissures after cleaning to see whether red fluorescence remains, then decide between sealing, monitoring and restoring together with the visual-tactile exam.
Q. Can a small buccal pit lesion simply be watched?
A. A small opening can sit over a wider lesion, so size alone is not the deciding factor. The post-cleaning image, surface texture, radiographic findings and the child's home care all go into the clinician's decision.
References
- Cho KH, Kang CM, Jung HI, et al. The diagnostic efficacy of quantitative light-induced fluorescence in detection of dental caries of primary teeth. J Dent. 2021;115:103845. DOI