
Intraoral Fluorescence Photography: Four Repeatable Basics
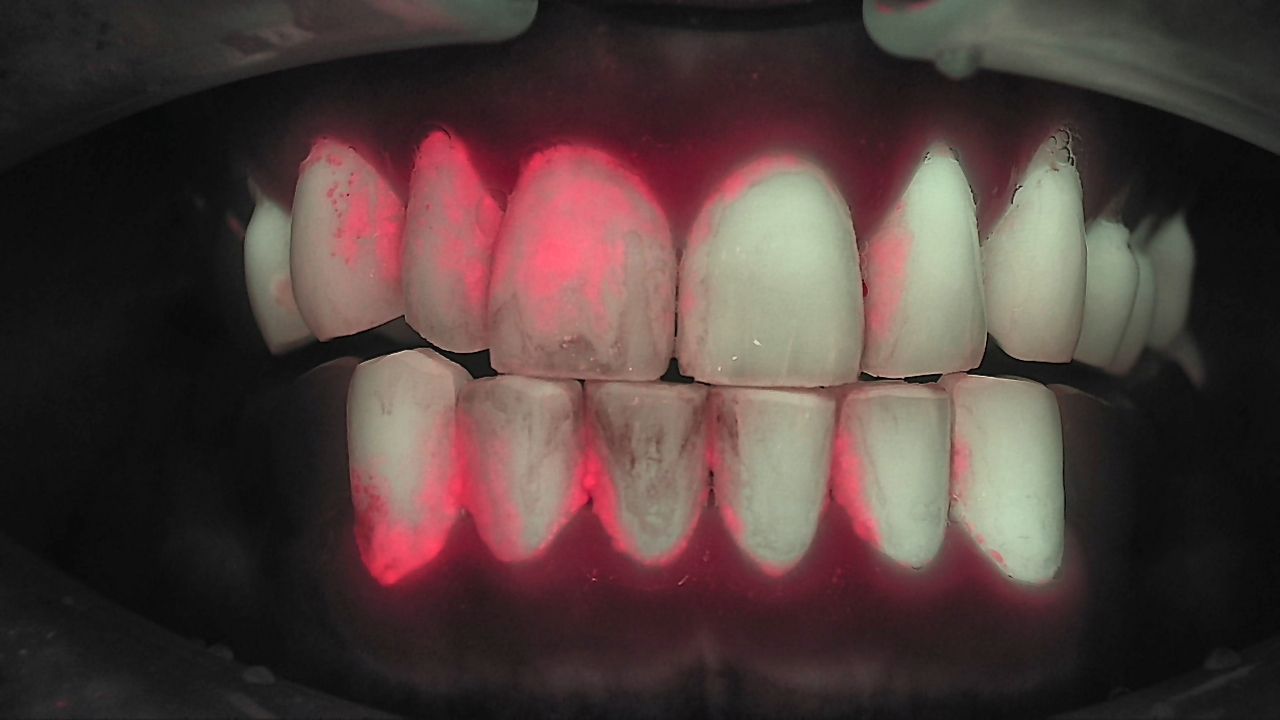
Intraoral fluorescence photography is easy to start and surprisingly hard to standardize. The sentence we hear most from practices that just began shooting is "the angle is different from last time, so I can't compare." A little chairside light turns a clean fluorescence image into a red haze. A few centimeters of distance makes the same tooth look like another tooth. This guide covers the four basics for standardized intraoral photos, dry field, distance, angle and lighting, and the settings that change when you are looking for caries versus a crack.
Why "the same" matters more than "a good one"
A single image earns its value when it sits next to the next one. Today's Qray fluorescence image is already something to show the patient. Its real job appears at the next visit, when the same site is captured again and the two are compared. A different date does not make a comparable image. Same area, same direction, same light source. And the observed difference should be kept separate from its interpretation.
Standardization is a matter of sequence, not equipment. Decide that every new patient gets a frontal view and two lateral views first, and that any suspicious site gets one close-up on top. One practice reports that three Qraycam Pro images let the team explain findings and a treatment plan chairside, without a study model, in a single sitting. Staff images are rough at first. Practices agree the routine itself matters more than the first results.
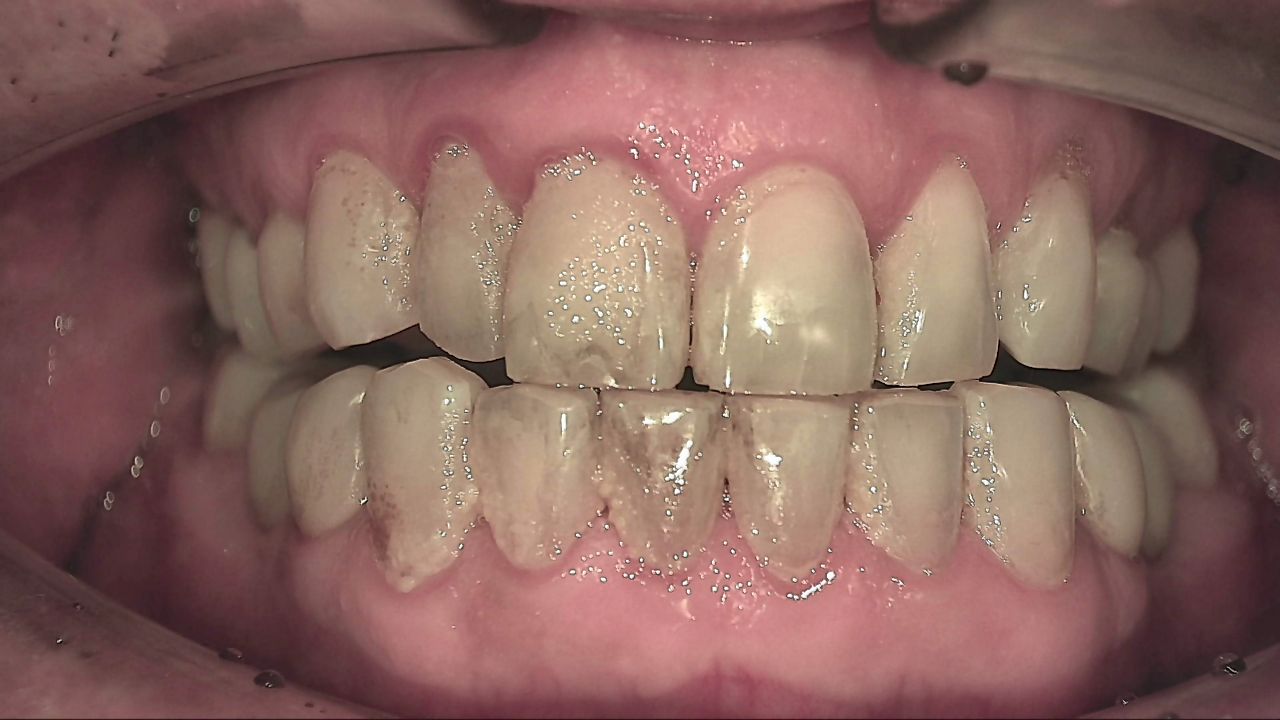
Lighting: when the whole image turns red
Ambient light is the first thing to check. Fluorescence induced by 405 nm light mixes with the operatory light or window daylight and produces a tooth that glows red all over. Clinicians sometimes call it the "butcher shop image." The most common mistake is shooting with the chair light on. The Qraycam Pro user manual instructs users to turn off the light attached to the dental chair before use.
Light control is a room setup, not a device setting. The fixes practices use are simple. Switch off the chair light. Lower the blinds in the morning if the operatory faces the sun. Install a wireless switch that turns off only the ceiling lights around the camera chair. Place the camera away from the window. With a handheld device like Qraypen C, shield the field with your free hand. With Qraycam Pro, shoot inside the hood. If you can see a crack with your eyes but the fluorescence image shows no red line, check for stray light before you blame the settings.
Nobody looks into the LED. As the manual states, the light is directed into the oral cavity only, and neither operator nor patient looks directly at the LED.
Distance and intensity: caries and cracks are different
Stay inside the manual's range, then adjust for what you are looking for. Qraycam Pro is used 5 to 20 cm from the teeth, without contacting the mucosa. Qraypen C offers three LED brightness levels. The same device is set differently depending on the target.
Caries close and bright, cracks farther and dimmer. The red fluorescence of a carious lesion rises from depth, so holding the device as close as the range allows at a higher brightness helps. A crack sits near the surface. At full brightness, the reflection of the 405 nm light overwhelms the line. Move back slightly or step the brightness down and the red crack line shows more clearly. Dentin fluorescence varies from person to person, so there is no absolute setting. Start at the default and reduce the level if reflection is strong.
No red does not mean no crack. Red fluorescence appears only after biofilm has settled into the gap for some time, so a recent crack may not glow red. Early occlusal lesions under thick enamel can also pass without red. Suspicious sites are read together with periapical radiographs and other tests.
| Setting | Looking for caries | Looking for a crack |
|---|---|---|
| Distance | As close as the manual allows | Slightly farther back |
| LED brightness | Default, higher level | Lower level to reduce reflection |
| Angle | Occlusal straight on, plus an oblique view that shows the proximal surface | Occlusal, buccal and palatal views, tilted toward the root |
| Read together with | Bitewing or periapical radiograph, visual exam | Bite test, percussion, radiograph |
Angle: how many views are enough?
Three views are the baseline: one frontal and two laterals. Shoot the frontal view edge to edge so the lower incisal edges are included, and add a slightly open view so a lesion hidden in occlusion is not missed. Lateral views are where cervical wear and cervical caries show up. Qraycam Pro has an anterior mode and an occlusal mode, and the occlusal mode offers three focus steps.
Changing the angle changes the information. For crown margins, have the patient open slightly less and shoot from below the cervical area upward toward the crown. Lingual margins collect plaque, so re-shoot them after scaling. For a suspected crack, capture the occlusal and palatal views, then tilt the device. A line that continues toward the distal root sometimes appears only in the tilted view. After preparation, shoot the margin again to see how far the crack line remains.
A full-arch image and a close-up play different roles. The usual order is a Qraycam Pro screening of the whole mouth, then a Qraypen C close-up of the suspicious site. Close-ups without a full-arch image are hard to locate at the next visit.
Dry field and focus: fewer blurry images
Fog is handled with air and suction. The longer the camera stays in the mouth, the more breath condenses on the lens. An assistant blowing air from the side, or suction placed next to the camera, sharpens the image. For children, suction removes saliva and fog together. Blowing air toward the lens also helps the autofocus lock.
With Qraypen C, a rest and a quick press are the key to focus. The liquid lens needs a stable rest. The longer you hover, the more breath and movement affect the image. New users practice positioning and resting on a W block and move on quickly. The dual mode that captures a white light image and a Qray fluorescence image together is recommended over fluorescence only, because a fluorescence-only capture can bloom and make the tooth or lesion look washed out. Many clinicians shoot several frames and keep the best.
What a matched pair looks like
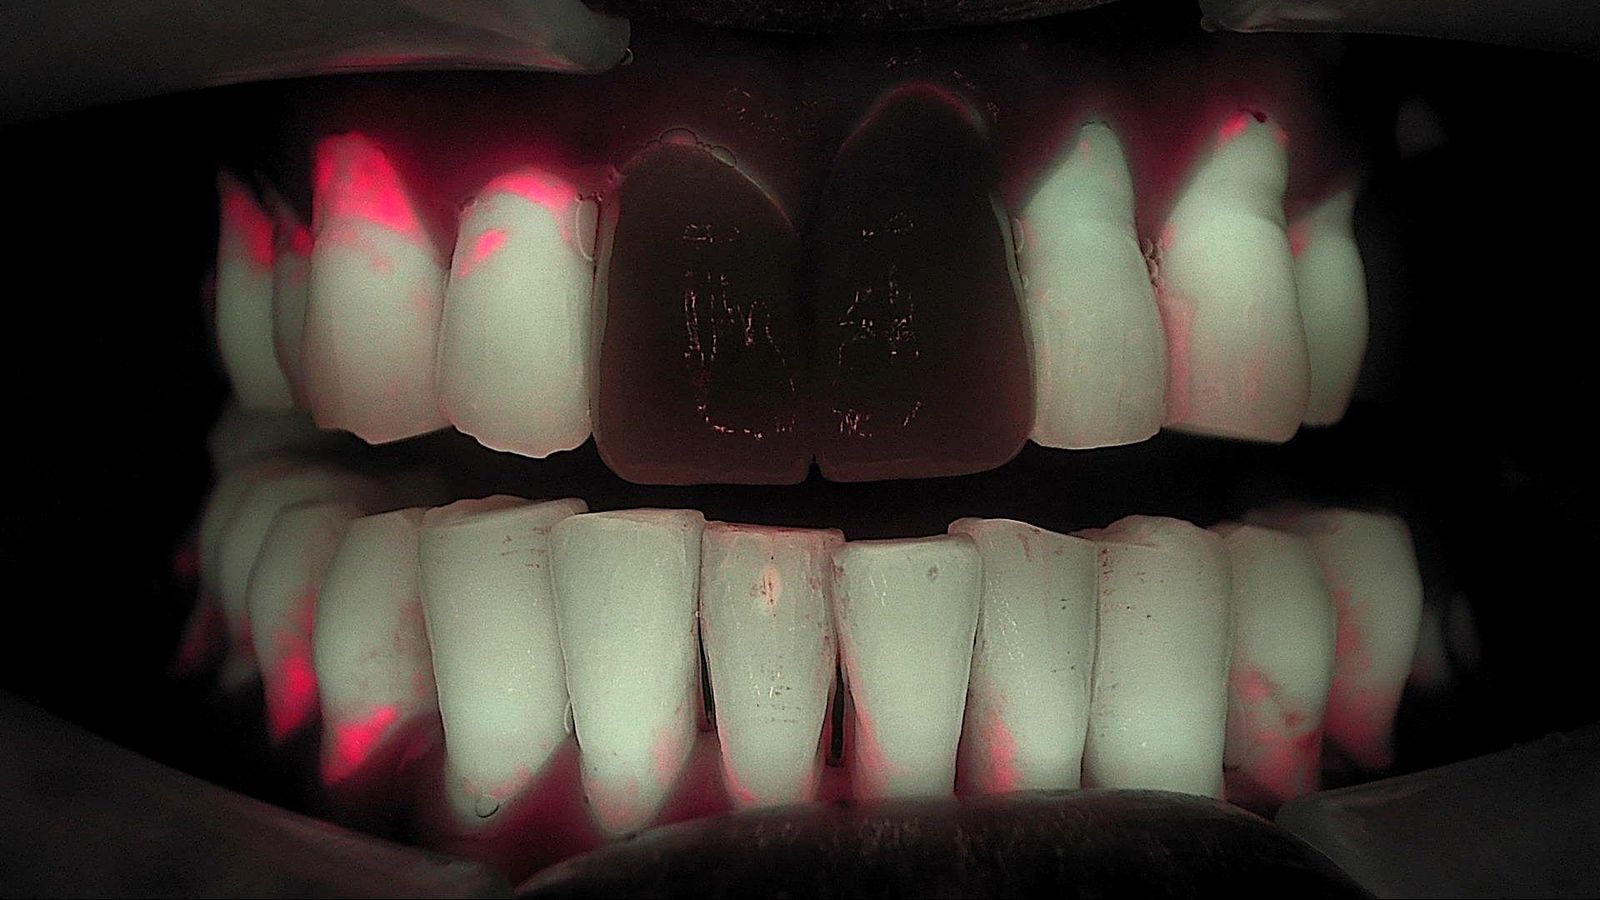
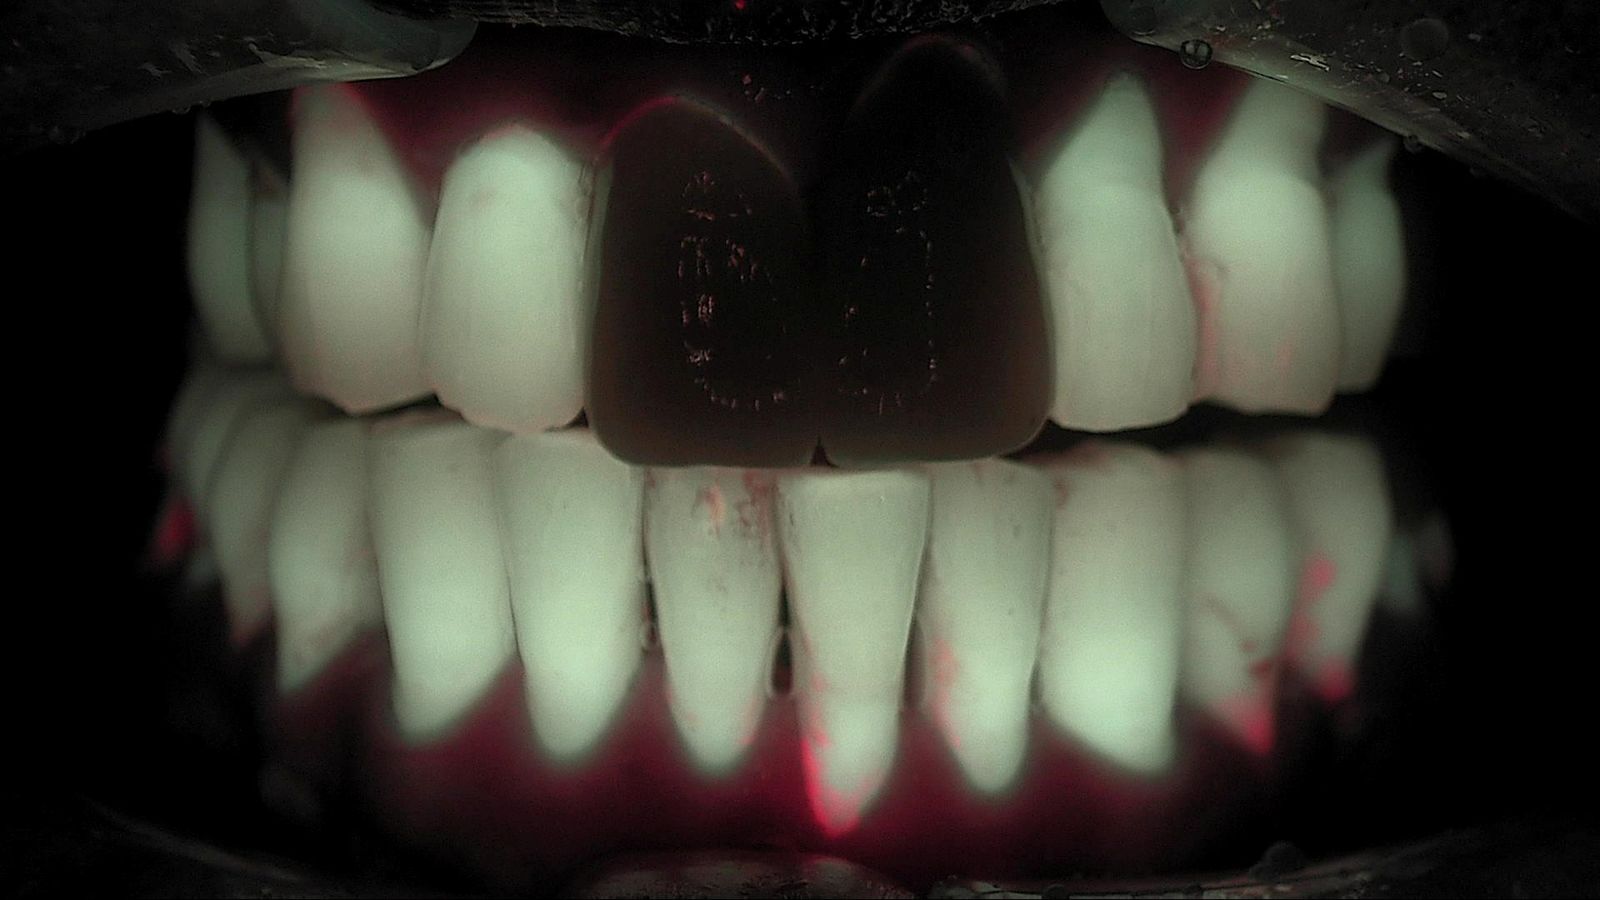
Same patient, ten months apart, same conditions. Both images were taken before scaling, frontal, under the same light. Because the conditions match, "the red along the gingival margin is reduced" is a statement you can make with confidence. With a different angle or brightness, you could not. How this pair becomes a conversation is covered in Intraoral Photo Comparison: Last Visit, Side by Side.
What's next
Images captured under matched conditions are stored in LINKDENS, pulled up side by side at the next visit, and delivered to the patient as a report. For the practice owner, getting the basics right is not about image quality. It is about turning one capture into the baseline for the next visit. It does not guarantee a return visit or case acceptance. It does make the explanation clearer every time a comparable image is added. When that comparison continues visit after visit and connects to continuous care through QBLISScare, the capture routine becomes a practice asset.
FAQ
Q. What is the first thing to check in intraoral fluorescence photography?
A. Ambient light. Turn off the chair light, block window daylight, and shield the field with a hand or hood before shooting. Stray light is the most common reason an image glows red or a crack line disappears.
Q. How many standardized intraoral photos per patient?
A. One frontal view edge to edge and two lateral views are the baseline. A slightly open frontal view reduces hidden areas, and suspicious sites get a separate close-up.
Q. Where do dental clinical photography tips start for a new team?
A. Make the three-view capture a routine for every new patient, split the roles so staff capture and the clinician reads, and write down the practice's distance, brightness and angle standards so anyone produces similar images.