
Red Biofilm Care Protocol: Screen, Clean, Diagnose Precisely
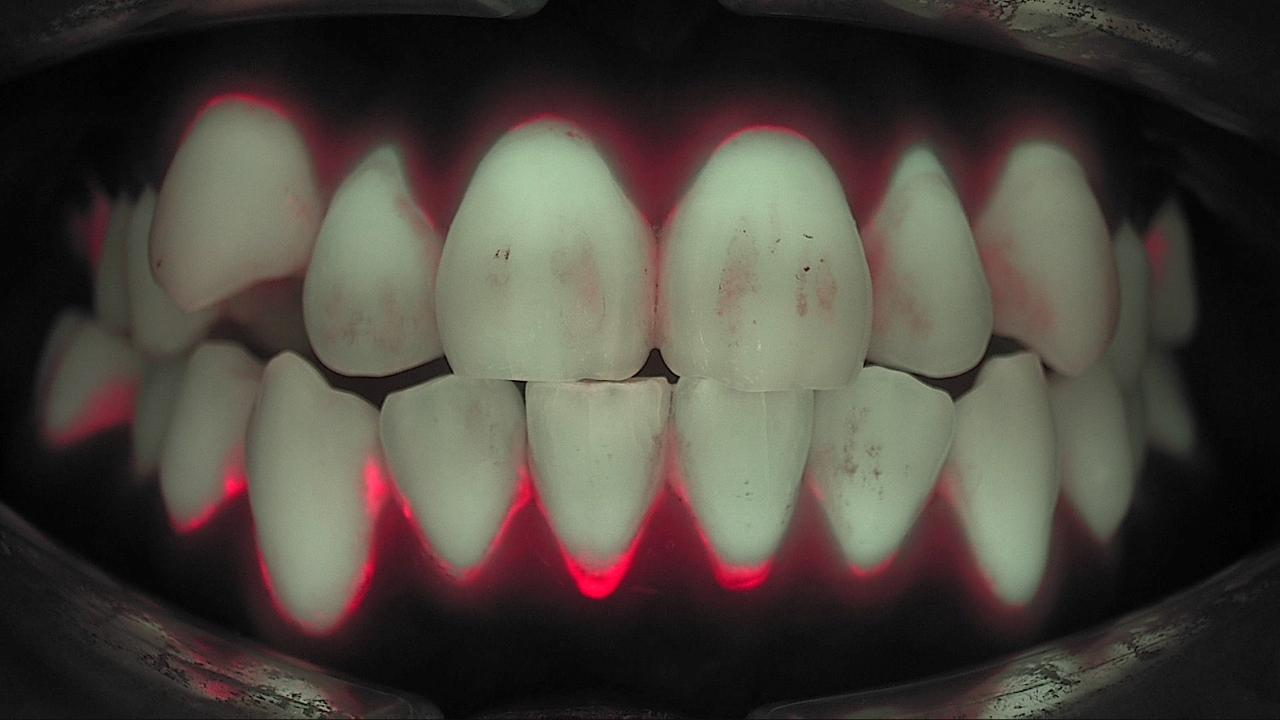
The Red Biofilm Care protocol is the single-visit workflow AIOBIO describes for dentists and hygienists. The name is long, the idea is one line: screen first, clean thoroughly, then diagnose precisely. This article walks through what each of the five steps does, why the order matters, and how a practice divides the steps between the hygienist and the dentist. Why red fluorescence shows biofilm in the first place is covered in Dental Plaque Fluorescence: Why Mature Biofilm Glows Red.
Why start with biofilm?
Red fluorescence is the signal of mature biofilm. In a laboratory study, biofilms grown from human saliva and imaged day by day showed red fluorescence increasing clearly up to day seven, with strong correlations to total bacterial counts, aciduric bacterial counts and enamel lesion depth. It is a laboratory model, so it is not a clinical outcome, but it is the mechanistic basis for reading red as biofilm that has stayed too long and become more cariogenic.
You cannot read the tooth properly until the biofilm is gone. A Qray fluorescence image taken over plaque can make a caries lesion look larger than it is. That is why this workflow insists on screening and cleaning before reading. The first four steps of the biofilm management protocol are, in part, preparation for doing the fifth step accurately.
Step 1, Screening: survey the whole mouth
Three Qraycam Pro views, frontal and both laterals, screen the entire mouth. Much as a panoramic radiograph surveys structure, a full-arch fluorescence image shows where mature biofilm sits and which sites look suspicious for a crack or caries. Fluorescence does not replace radiographs. It adds functional information to structural information. Suspicious sites are re-checked later with a Qraypen C close-up.
Step 2, Hygiene evaluation: see what is not getting brushed
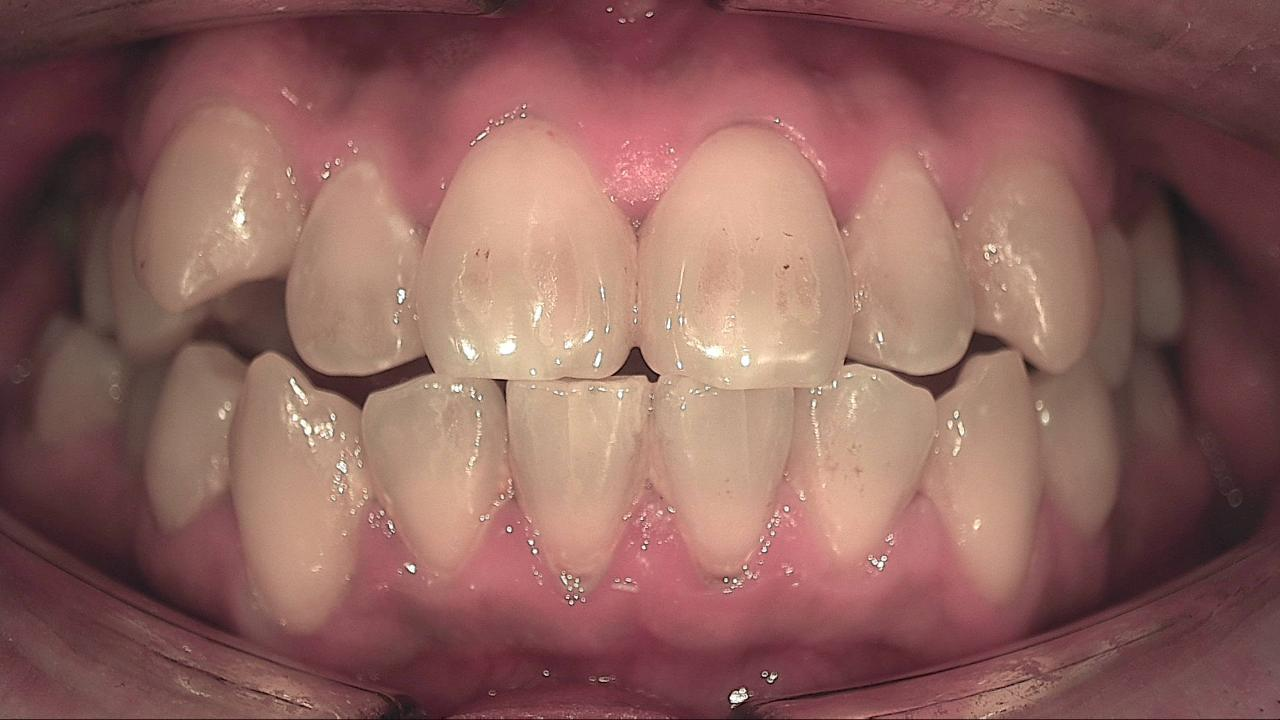
The distribution of red is the patient's brushing pattern. Which side is cleaned well, which side is missed, and where plaque keeps accumulating on crowded teeth all show up in the image. The hygienist puts the image on screen, points to "this much, here," and agrees on technique and tools with the patient. LINKDENS Insight Brush is the module that evaluates and compares oral hygiene from fluorescence images and links it to coaching. When the patient compares today's image with the last visit, the coaching is based on their own pattern rather than a guess.
Step 3, Biofilm management: three branches
Calculus removal, biofilm removal, and professional mechanical tooth cleaning. An ultrasonic scaler removes calculus, an air polishing device removes biofilm, and rubber cup or EVA tip cleaning finishes the surfaces. Imaging between branches shows the red fluorescence shrinking after air polishing and again after ultrasonic scaling. "Clean thoroughly" means working until you can see the red disappear.
Step 4, Re-evaluation: before and after, side by side
Re-image after scaling at the same angle and compare. The before image shows where the biofilm was. The after image shows what clean looks like. Red that remains is not a report card. It becomes the next target and the basis for the next visit. Comparison is only valid between images of the same site, same direction and same light.
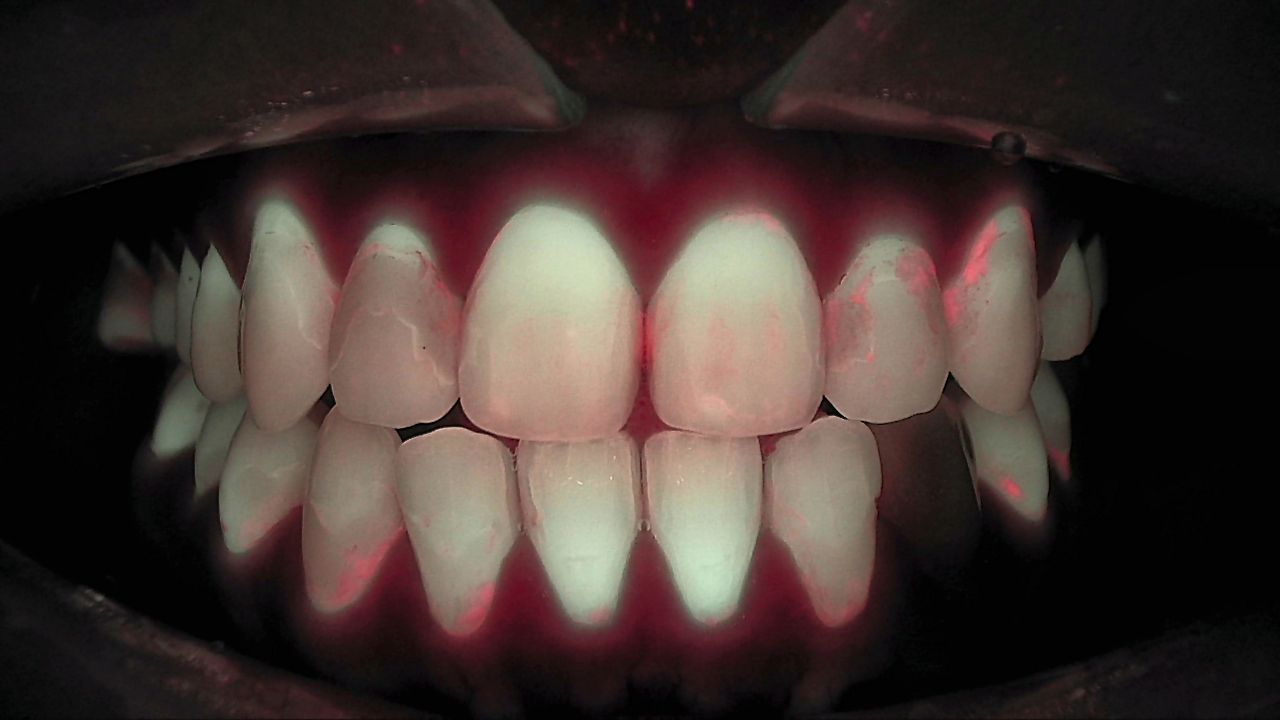
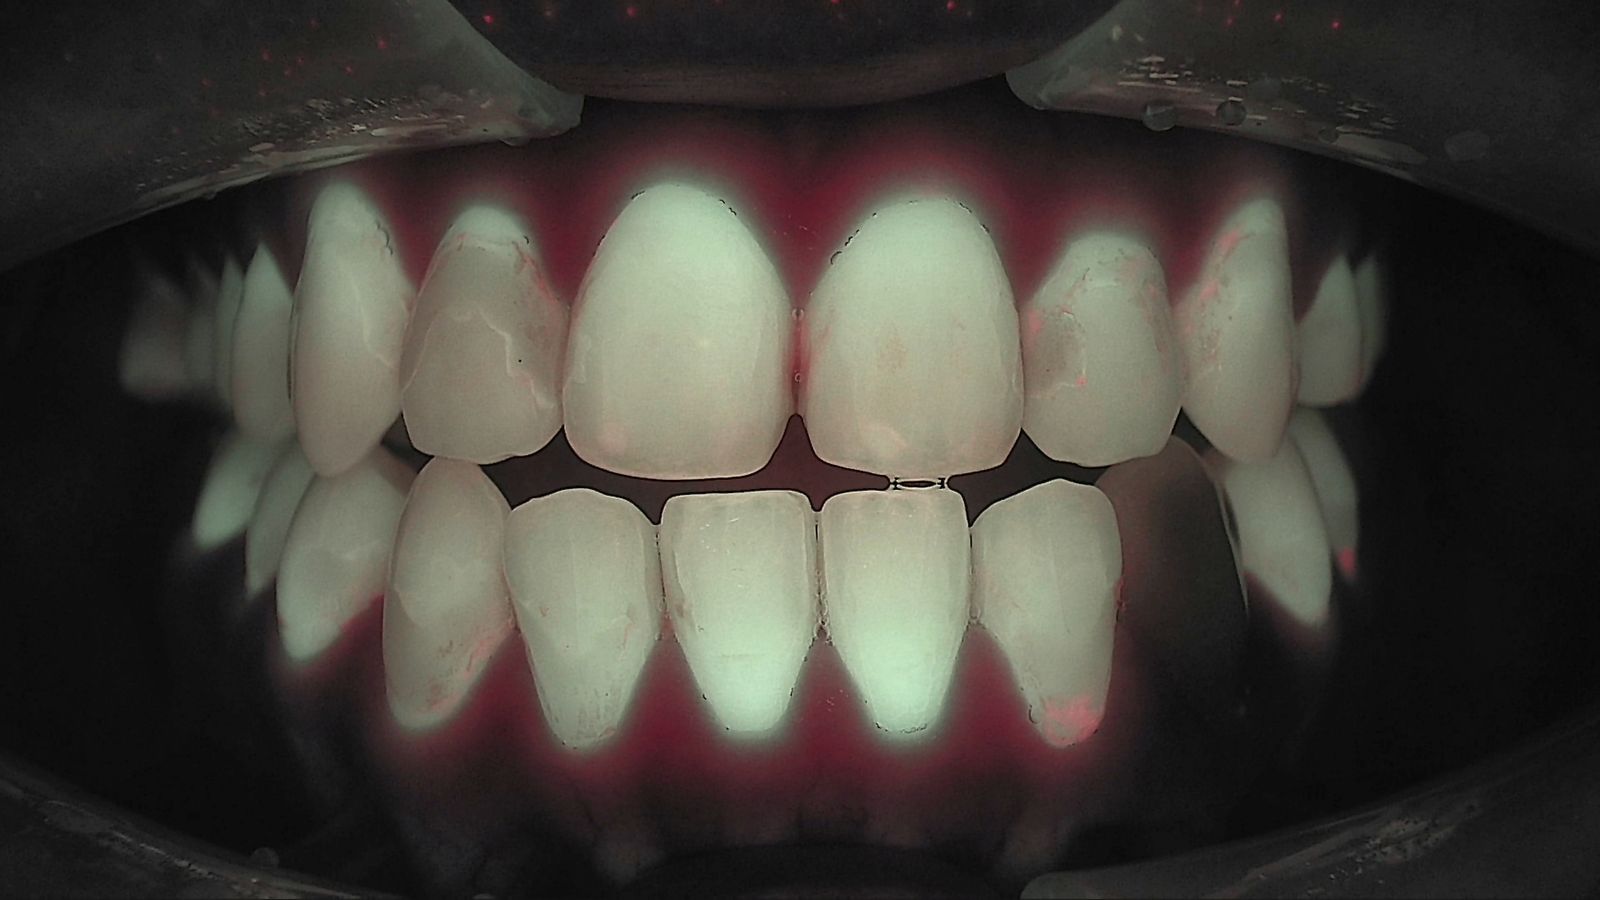
How the before-and-after pair becomes a conversation is covered with two cases in Plaque Before and After Scaling: Show the Red Disappear.
Step 5, Diagnose precisely: now read the tooth
Only after the biofilm is removed is the tooth's own fluorescence read. White spots, proximal lesions, restoration margins and crack lines are the tooth's signals, and they are read on a clean surface to avoid overestimation. At this step the functional information from fluorescence sits next to the structural information from radiographs, bite tests or percussion are added as needed, and the dentist decides. "Diagnose precisely" does not mean the device diagnoses. It means a clean tooth is read carefully together with the other tests.
| Step | What is done | What is looked at | Who usually does it |
|---|---|---|---|
| 1 Screening | Three full-arch views (frontal, left, right) | Mature biofilm distribution, suspicious sites | Hygienist or assistant |
| 2 Hygiene evaluation | Explain the red sites, review the brushing pattern | Sites that keep recurring, change since last visit | Hygienist |
| 3 Biofilm management | Calculus removal → biofilm removal → surface cleaning | Red fluorescence shrinking after each branch | Hygienist |
| 4 Re-evaluation | Re-image at the same angle, compare before and after | Remaining red = next target | Hygienist, dentist confirms |
| 5 Diagnose precisely | Clean-tooth fluorescence plus radiographs and clinical tests | White spots, caries, margins, cracks | Dentist |
The same workflow for orthodontic and implant patients
Appliances add places for biofilm to hide. The workflow does not change. For orthodontic patients the red keeps returning around brackets and under wires. For implant patients it returns at the prosthetic margin and the peri-implant mucosa. One full-arch image at each monthly orthodontic visit, one before-and-after pair at each implant maintenance visit, in the same order, closes the gaps that appliances create. Peri-implant maintenance is covered in Peri-implantitis Doesn't Hurt.
What's next
Once the five steps have run, the full-arch images, the before-and-after pair and the reading are stored in LINKDENS, delivered to the patient as a report, and become the baseline for the next visit. For the practice owner, the value is not a few images. It is that the hygienist owns steps one through four and the dentist confirms step five, and that division becomes the practice's routine. It does not guarantee a return visit or case acceptance. It does mean that when the same workflow repeats every visit, the patient knows what they are coming back to check. When that repetition connects to continuous care through QBLISScare, a scaling appointment stops being a one-off procedure and becomes one link in ongoing care.
FAQ
Q. Is the biofilm management protocol applied identically to every patient?
A. The workflow is the same, but the tools and depth at each step depend on the patient. Some patients need only observation and coaching. Others need additional tests at the precise reading step. It does not mean every device is used on every patient.
Q. How much time does the five-step workflow add?
A. It varies by practice. When the hygienist captures and explains and the dentist only confirms the final reading, it adds a few images to the existing recall flow. Practices report that it feels like extra work at first and stops adding much time once it is routine.
Q. What if red fluorescence remains after scaling?
A. That is not a problem in itself. The remaining site becomes the next target, and if needed the dentist evaluates it at the precise reading step with other tests. It is re-imaged under the same conditions at the next visit to track the change.
References
- Kim YS, Lee ES, Kwon HK, Kim BI. Monitoring the maturation process of a dental microcosm biofilm using the Quantitative Light-induced Fluorescence-Digital (QLF-D). J Dent. 2014;42(6):691-696. DOI